Starting from March 31, 2021, AWS will deprecate its own vendored ‘request’ package for Python (details).
What a dev to do when in time of need? Adding it to the function as a folder is too tedious and takes up space, clutter the file structure, and can prevent us from editing the code on Lambda main page because it is too big which is a bit annoying…
Also, what do you do when you need this package for any another Lambda? This is dependency hell…
Well, fret not, Lambda layer to the rescue!
This nifty feature will allow you to use any package as a separate part from the Lambda function, allowing you to use it as you do on any other Python script.
You can also share the layer among other Lambda functions, which is a cool feature by itself, this will save you heaps of storage space and dealing with upgrading code versions on every single function you have.
What do you need to do?
Just upload the layer once and reference it in any Lambda function in the region where it was deployed. The code inside a layer could be anything. It could be dependencies, configurations or helper functions such as Logging, Recording metrics, etc…
You should know that you can link up-to five Lambda layers per function – The uncompressed size of a layer must be less than 250MB.
You should note that if you have multiple Lambda layers, the order is important, as the Lambda layers depend upon each other. (This is useful when adding a custom runtime layer). Layers are immutable and can be versioned to manage updates. You can also share layers securely (Using IAM) within your AWS account or cross-accounts.
Initial step prior to uploading the Python module as a layer:
First create a folder that will hold the module that you want to upload, for example requests (urllib3 is included), then download the module locally:
-
‘mkdir python ; cd python’
-
‘pip3 install requests -t ./’ (mind you – there is a dot before the forward slash) (use pip3 for python3, pip for python2)
-
Zip the python folder
How to create a Layer:
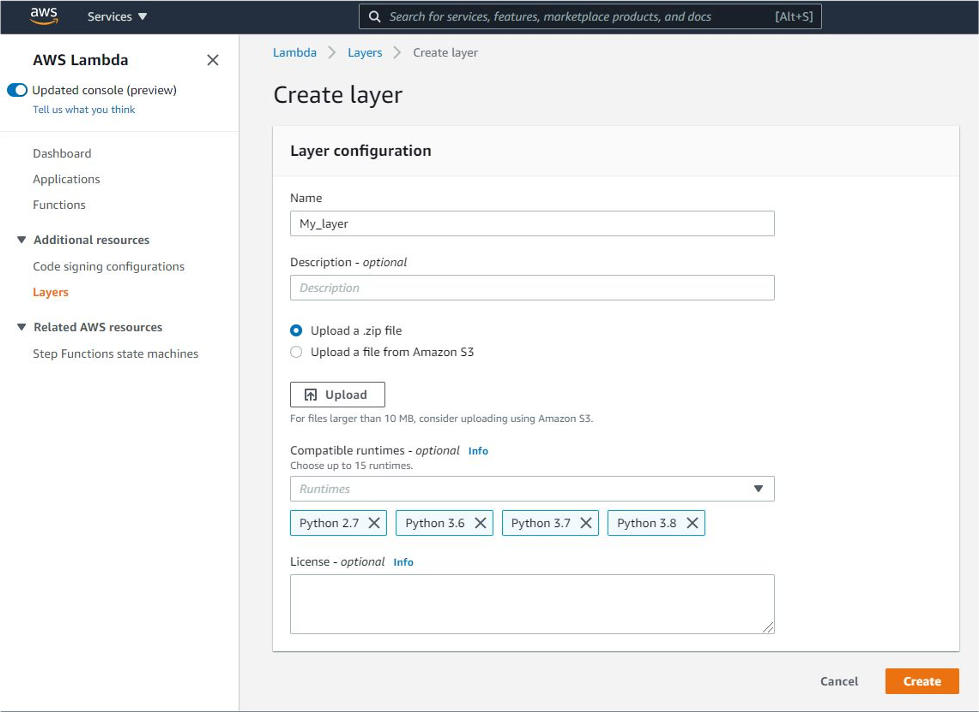
In the AWS Console, Go to Lambda Dashboard > Additional resources > Create layer
-
Provide a name
-
Select compatible runtimes: best to select all applicable versions, so you could use it on different functions
-
Upload the required module
Attach the module to the Function layer:
-
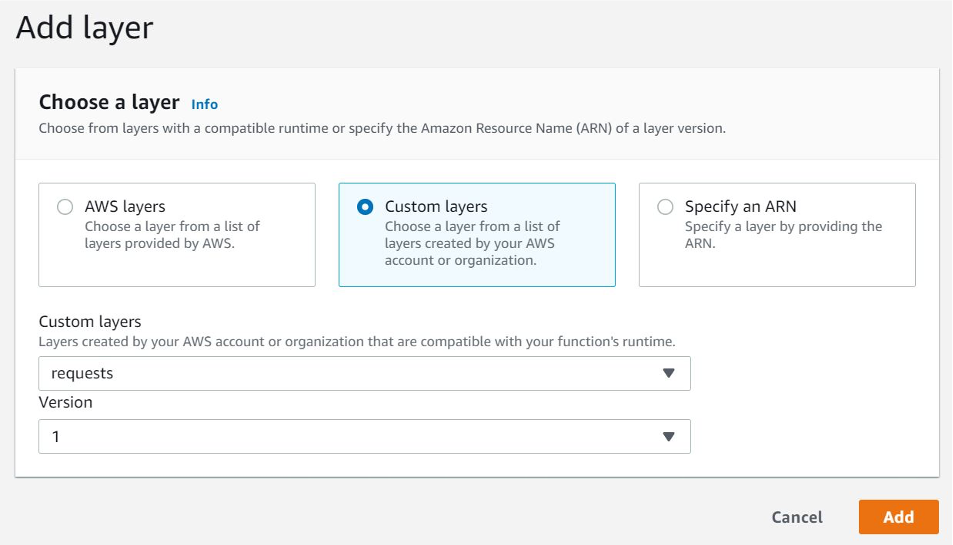
Click the layers button on the main function page > Add a layer > Custom layers > Select the newly created layer from the drop-down layer > Version 1 > Add to > Save
You can upload the desired module via aws-cli or use it with CloudFormation SAM (Serverless application model), but on this guide we will focus on using AWS console.
Troubleshooting:
If you encounter this error:
[ERROR] Runtime.ImportModuleError: Unable to import module ‘lambda_function’: No module named ‘requests’
This is due to incorrect folder structure or file permissions within the deployment package zip file.
How will it be used inside the function code?
Instead of using from botocore.vendored import requests
You will use import requests
More info can be found https://docs.aws.amazon.com/lambda/latest/dg/configuration-layers.html#configuration-layers-path
Screenshots:
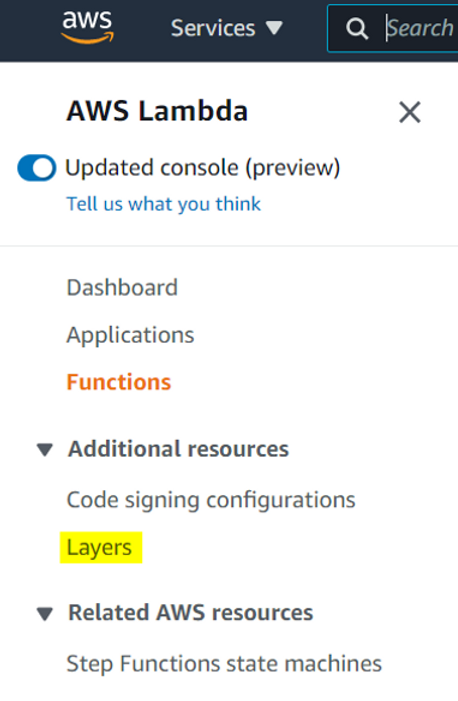
Go to Layers:
Provide the needed details:
You would want to select all the compatible runtimes in order to use it as widely as you need.
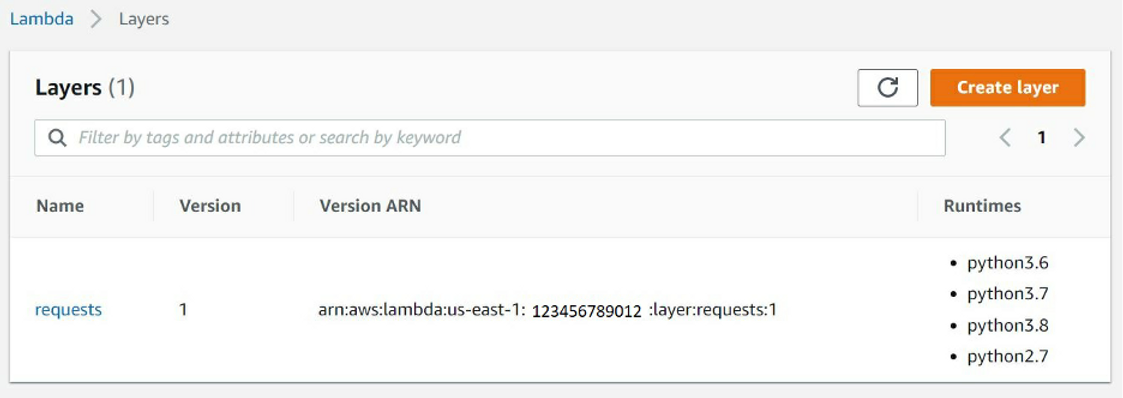
Once done, this is how it will be shown on the Layers page:
Adding a layer to the function:
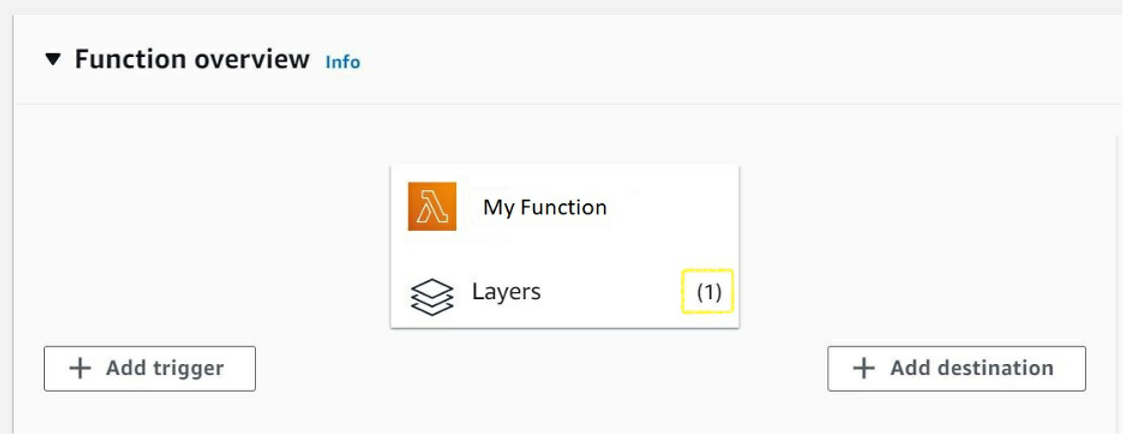
This is how it will look eventually on the Lambda page: