

A while ago I was asked to come up with a solution for using S3 presigned URLs in conjunction with CloudFront.
Presigned URLs – what are they? why should you use one, and with what service?
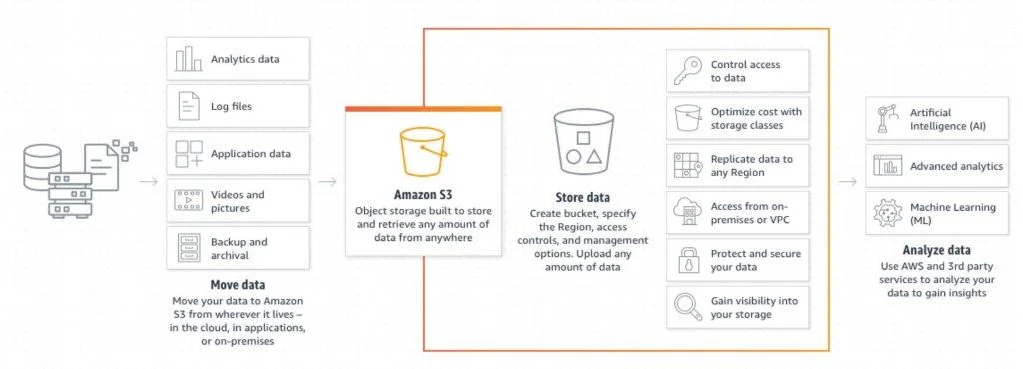
For those who don’t know, Amazon Simple Storage Service, better known as S3, is one of the first services that Amazon released way back in 2006 and is well known for its storage capabilities.
The importance of information security is well-documented and discussed on many platforms, as well as in my own articles. So when users, developers, sales personnel or actually anyone wants to share a file, whether code, an image, or a document, they need to do it in a secured manner.
You can (and should) setup your bucket with the relevant permissions and policies, but if you need to share a file, providing and maintaining the permissions can be time consuming. Instead, you can use a presigned URL, which is a time-limited link for that specific file. Note that anyone with that link can access your file, so be mindful with whom you’re sharing it.
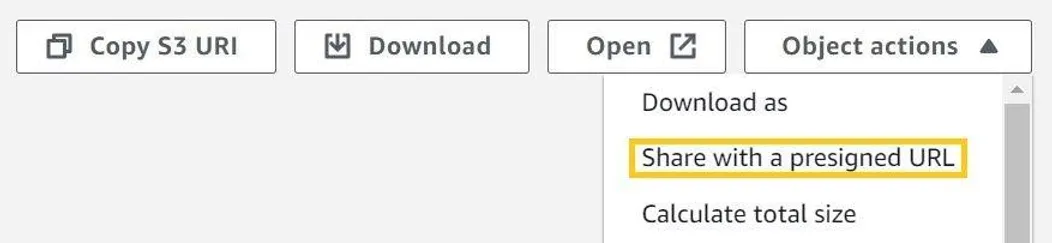
There are multiple ways to create presigned URLs: by AWS S3 console, SDK or CLI.
In your AWS console, navigate to the required file inside an S3 bucket and select Object Action, then Share with a presigned URL. A window appears in which you will need to select the expiration time, which cannot exceed 12 hours.
You might not know that:
-
There are ways to create a S3 presigned URL for up to 7 days, but for this you need to perform some permission magic, as described in: https://docs.aws.amazon.com/AmazonS3/latest/userguide/using-presigned-url.html#who-presigned-url
-
You can use presigned URLs for other tasks than just downloading a file.
By allowing any of the other main HTTP Methods, you can upload, delete a file or even perform S3 specific actions such as list buckets, or get a bucket location. See:
https://boto3.amazonaws.com/v1/documentation/api/latest/guide/s3-presigned-urls.html
So, we are all good to go? Just pass the S3 presigned URL, redirect it through CloudFront, and all is good in the world, right?
Well, no.
The thing is, S3 presigned URLs don’t work well with CloudFront, since they are two different mechanisms that practically do the same thing. CloudFront is the more elaborate, with many more options and functionality.
So, this is a time to put on my thinking cap and consider my possibilities.
Lets take out our building blocks and start to play.
For this to work, we would need S3 (as the file storage), Amazon Route 53, AWS Secrets Manager, CloudFront, AWS Lambda, AWS Certificate Manager (ACM), a dash of Python and we are good to go.
One would think that AWS Key Management Service (KMS) would be perfect for this task, because the private key is never revealed, but the fact is that by using the SDK you can only use the ENCRYPT_DECRYPT action. SIGN_VERIFY will not work in our use case, since you can never get the private key to open the encryption, so Secrets Manager is the next best thing.
For a cloudy dish, we would need:
1. a. An S3 bucket with encryption enabled – Check!
For this, I used an S3-managed encryption key (SSE-S3), but you can use AWS KMS (SSE-KMS), which differs from what is written above).
b. A bucket policy, so only CloudFront can access this bucket:
{
	"Version": "2008-10-17",
	"Id": "PolicyForCloudFrontPrivateContent",
	"Statement": [
    	{
        	"Sid": "Policy for CloudFront Signed URLs",
        	"Effect": "Allow",
        	"Principal": {
            	"AWS": "arn:aws:iam::cloudfront:user/CloudFront Origin Access Identity ABCDEFG123456"
        	},
        	"Action": "s3:GetObject",
        	"Resource": "arn:aws:s3:::BUCKET_NAME/*"
    	}
	]
}
2. A Route 53 hosted zone with Resource Record (RR) – Check!
We use Route 53 so that our URL to the customer will be in the format of our company name, instead of a randomly assigned CloudFront distribution URL. So: https://abctest12098.cloudfront.net/file would become https://coolcompany.com/file
To get our connection to the secured file, we need to use HTTPS, so an SSL certificate is needed. You can get an SSL certificate from any issuer, but AWS ACM is only a click away and easily generated.
3. SSL Certificate by ACM – Check!
ACM stands for Amazon Certificate Manager. It is a simple, reasonably-priced and fast service for getting publicly-recognized SSL certificates for your use cases, and can be easily used with the other AWS services.
https://docs.aws.amazon.com/acm/latest/userguide/acm-services.html
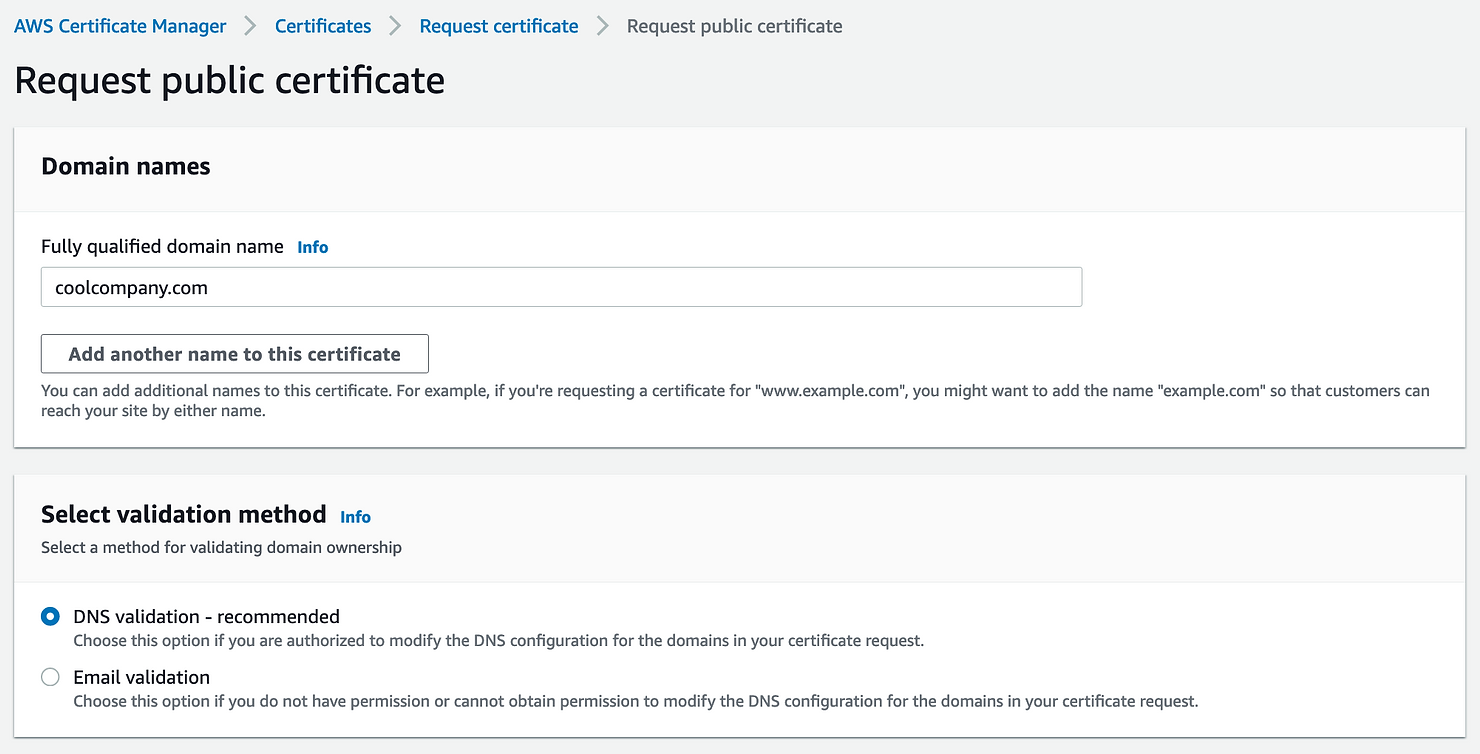
In order to request a certificate go to:

Proceed with adding details:
1 . The domain name for which you require a certificate.
2. The method you would like to use to verify your domain, either by adding a txt record to your DNS, or by email (if you don’t have access to the DNS).
This check can take a couple of hours while AWS scans your DNS and gets the response they’re after.
Once done, you will be notified that the certificate is issued.
On the CloudFront level, this should be configured in the General Setting tab.
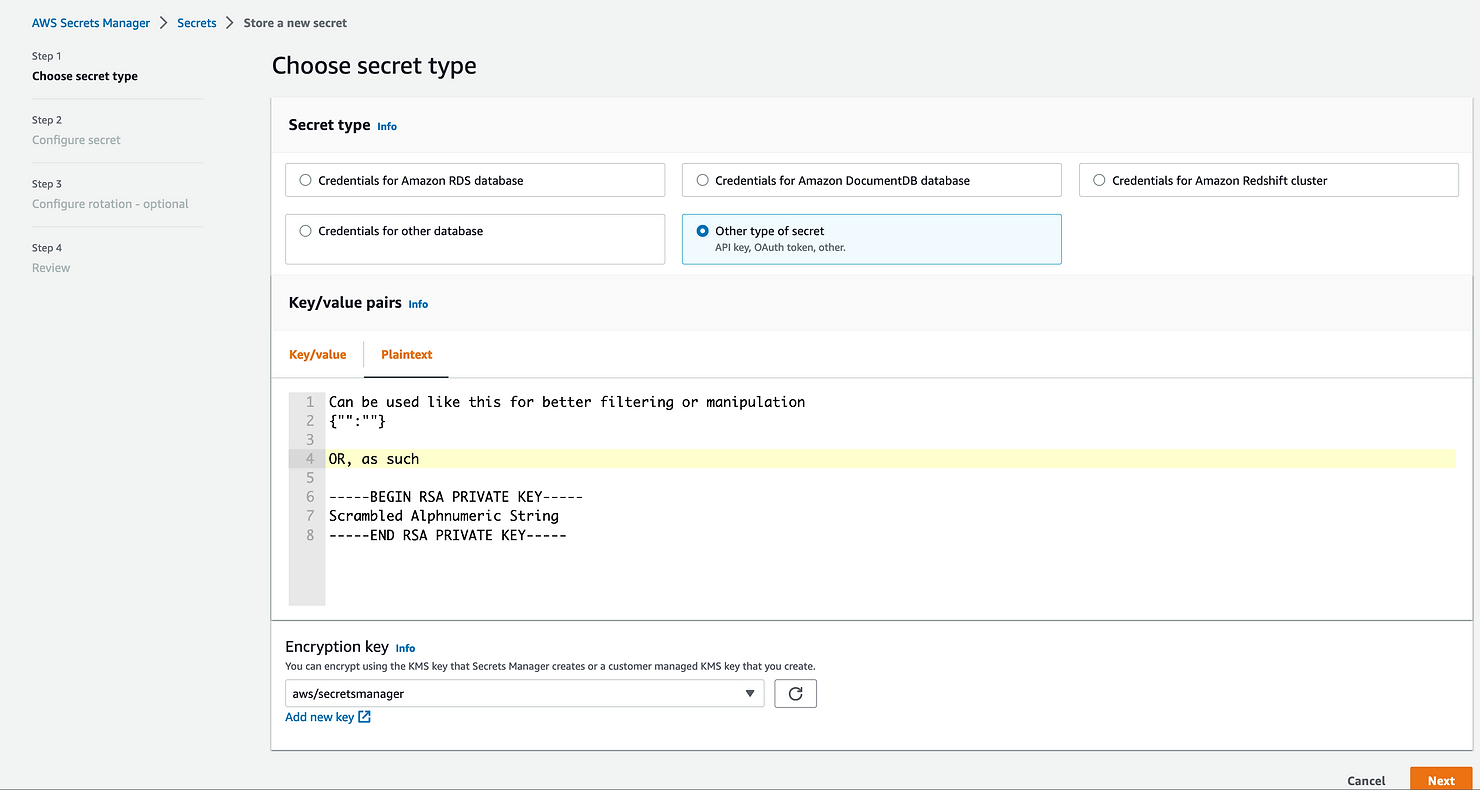
4. One saucy Secrets Manager – Check!
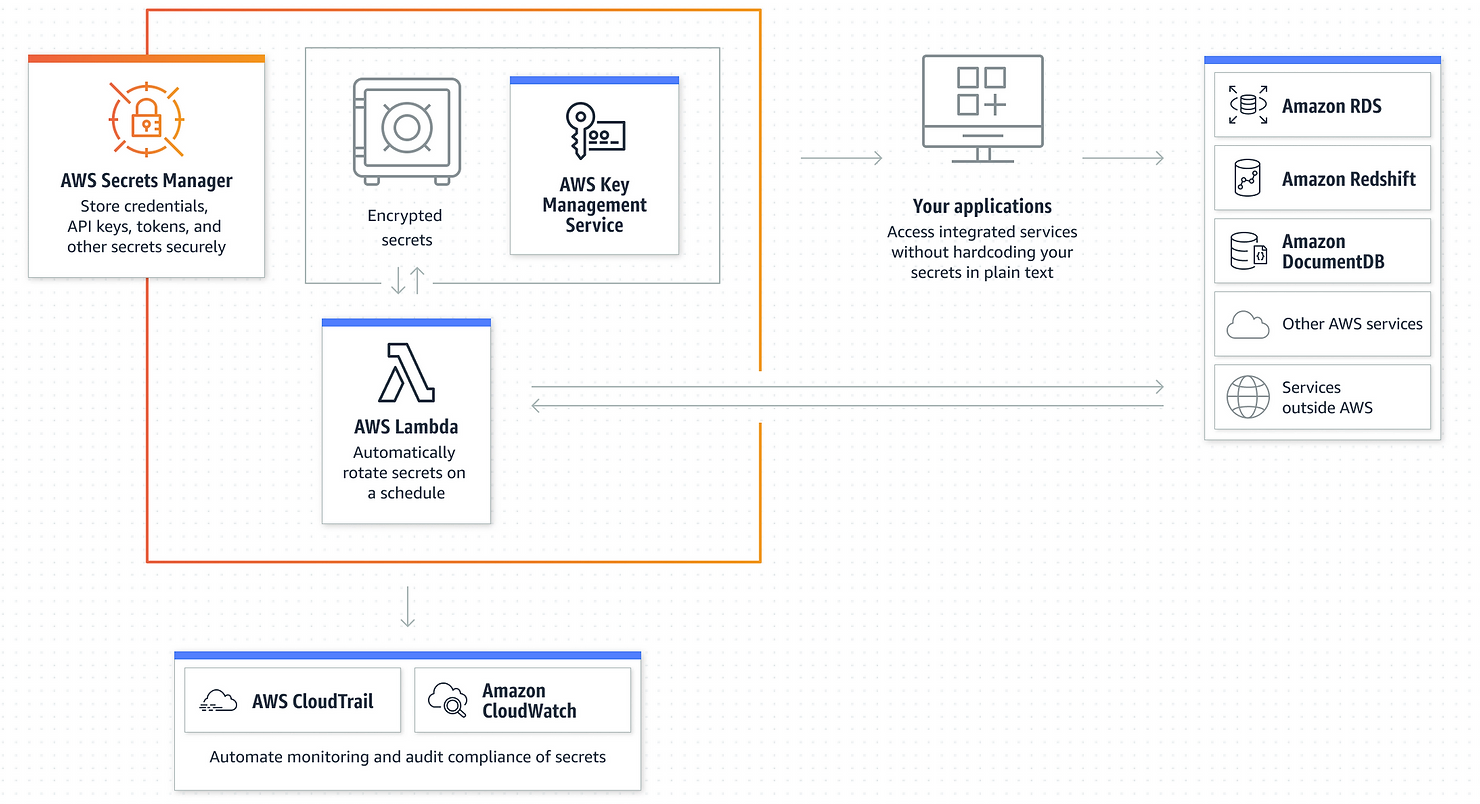
Secrets Manager is a service that allows you to manage, retrieve, and rotate database credentials, API keys, and other secrets throughout the span of their life cycles.
But first, let’s create the Public\private keys that we’ll use, head on to your CLI console and write:
* openssl genrsa -out private-key.pem 2048 – For the private key that will be stored in Secrets Manager.
* openssl rsa -pubout -in private-key.pem -out pub-key.pub – For the public key that will be stored in CloudFront.
As always, keep these files safe with the right permissions.
Here you would need to place the private key that will help decrypt your data for CloudFront.
First, select the type of secret you would like to use: database user/passwords, key/value or as plain text. Select what kind of encryption key you want to use: either the default AWS KMS key or your own.
The next page will ask you to provide a name for your secret, as well as adding permissions and rotation (both are optional). The last page is a review for all the data you entered. The service also provides some code examples to help you access your data, which can be useful.
5. 1 full tablespoon of CloudFront – Check!
Setting up CloudFront Distribution:
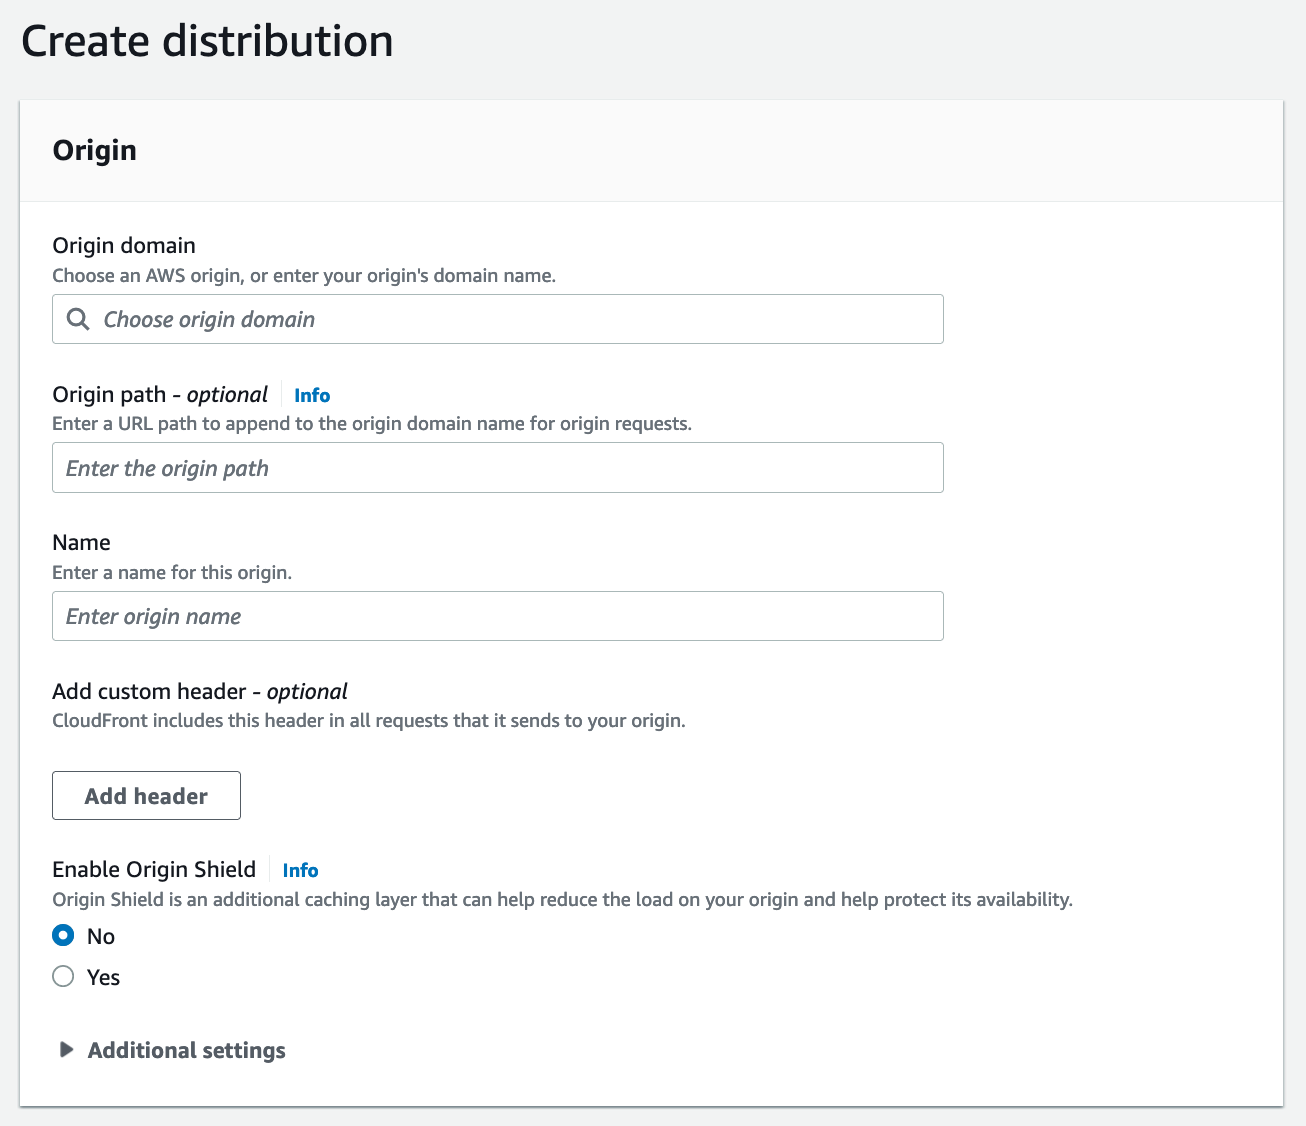
Origin domain – the source of the data that will go through CloudFront. For our example, we will use our S3 bucket: bucketname.s3.us-east-1.amazonaws.com
Origin path – optional location for your files (for example, a folder inside your bucket – ‘/files’)
There are more settings you can use to further enhance your CloudFront setup.
For example: Add custom header, Enable Origin Shield for reducing the load on your origin and helping protect its availability.
For Default cache behavior we will set up the access method to the data served to us.
No pun intended – we will actually address the HTTP Methods: compress objects automatically or not. This can be an issue with different types of data and frontend code, which viewer protocol policy should you use – allow HTTP or HTTPS? We will obviously use HTTPS. Most importantly: select Yes for Restrict viewer access.
Now, with the newly created keys that were created in the last step, go to the CloudFront console and in the Public keys section create a public key. Next, create a key group in Key groups, then return to Restrict viewer access, and under Trusted authorization type, select your key group.
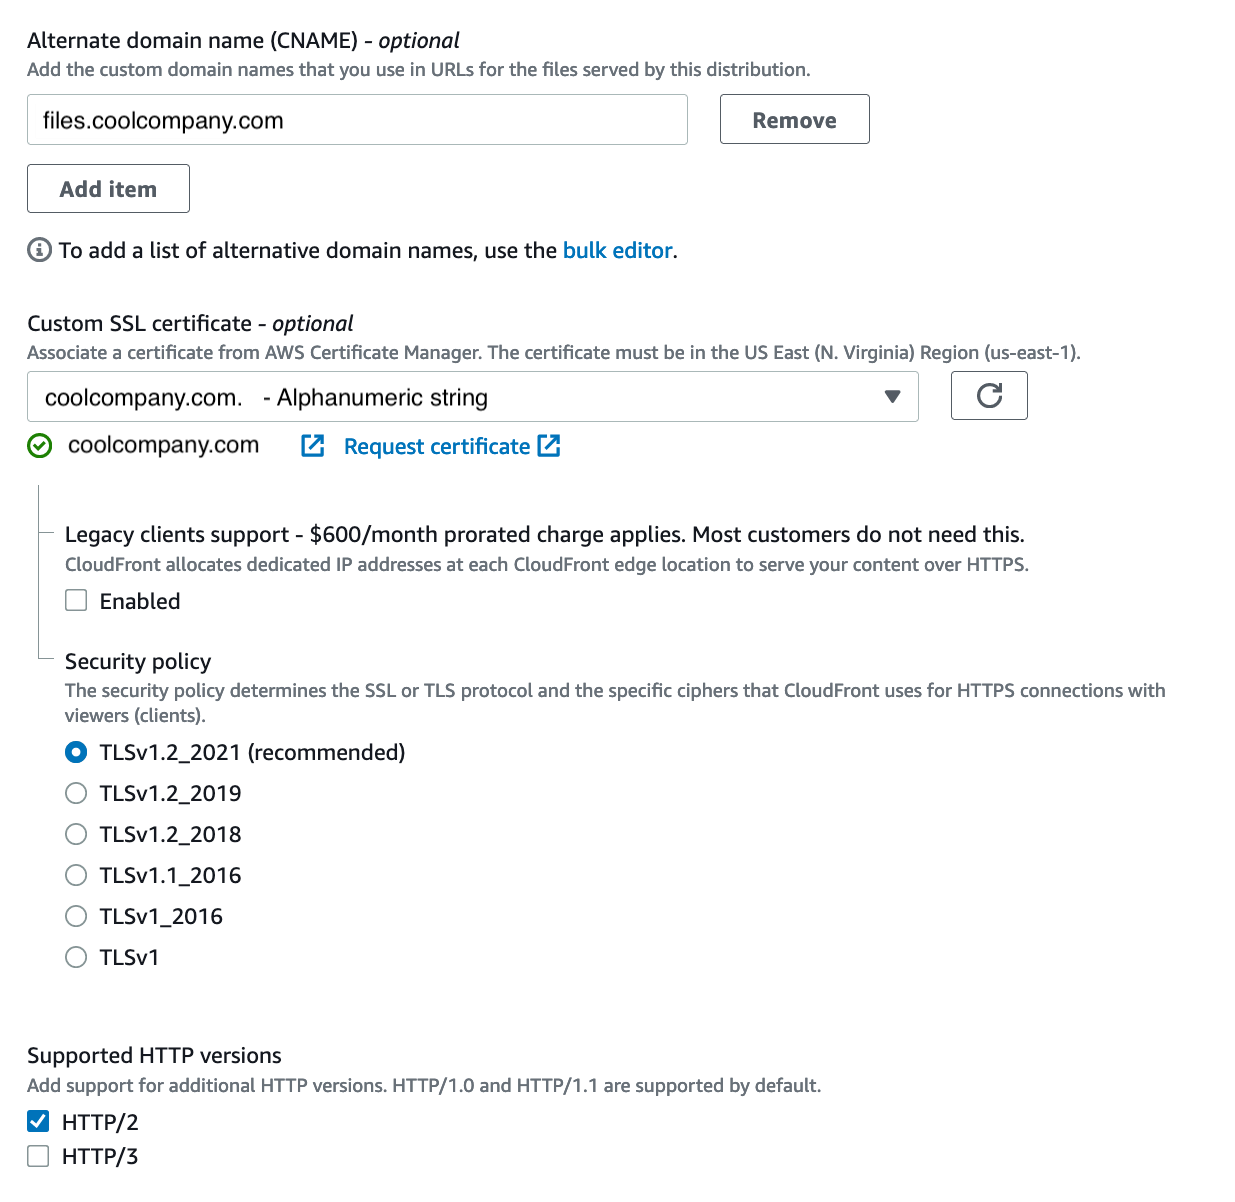
In the Settings section, you can set the price class, which is where your distribution will be deployed throughout the world, such as North America regions and/or and Europe, Asia, Middle East, and Africa. Note that the more regions your distribution is deployed to, the more time it will take to finish any changes you make to your setup. It may take up to an hour in some cases.
Moving on, there are options to use WAF and logging, to define the required TLS level, but moreover, it allows use of CNAME, via Route 53 as mentioned above, and use of an SSL certificate via ACM. So we can see that things start to incorporate into one single solution, or cake. It depends.
6. One spicy Lambda – Check!
Lambda is truly one of my all-time favorite services on AWS. The ability to run code that can connect/receive data to/from almost any service in AWS is outstanding. This service is really fun to use and to play around with, when the only limitation is your own mind.
File & stream processing, web application and managing backends, whatever you need, Lambda does it all.
The lambda function actually takes all of our ingredients, heats them real good and provides us with the final product:
With this function we are able to get the URL from CloudFront, decrypt it and provide customers with their file using a presigned URL.
In order for us to decrypt the received key, we need to use some additional python packages: rsa, pyasn1 & boto3. This can be used as a layer inside the Lambda function (see here for more details), but can be uploaded to the function itself as a folder.
The private key can be placed here in plain text, but this is, well, plain silliness. Instead, we will use Secrets Manager instead.
Test event example:
{
    "fileName": "File.txt",
    "Year": "2022",
    "Month": "11",
    "Day": "27",
    "Hour": "12",
    "Minute": "01",
    "Second": "02",
    "Micro": "1"
}
For the sake of dynamic parameter provision, further improvements and ways to receive the input, the Lambda requirements can be met by sending the file name and date via a Cloudwatch event, or anything that can trigger a Lambda (SQS, SNS, etc.).
Get the Private key from AWS Secrets Manager:
	client = boto3.client('secretsmanager','us-east-1')
	response = client.get_secret_value(SecretId=secret_name)
	private_key = response['SecretString']
	return rsa.sign(message, rsa.PrivateKey.load_pkcs1(private_key.encode('utf8')),'SHA-1')
You can use the CloudFront URL or the Route 53 URL (they are the same):
url = “https://abcdefg1234567.cloudfront.net/File.txt”
url = “https://coolcompany.com/{}”.format(File_name)
    	expire_date = datetime.datetime(Year, Month, Day, Hour, Minute, Second, Micro)
    	key_id = ‘A1234B123C’   ##
Important
! You need to get it from CloudFront Public keyId.
    	signer_cf = CloudFrontSigner(key_id, rsa_signer)
    	signed_url = signer_cf.generate_presigned_url(url, date_less_than=expire_date)
    	return signed_url
By adding more guardrails inside the lambda function, you are blocking intruder requests, and you can decide which response, if any, they will get, as well as not providing access to the naming convention used in the S3 bucket, further usage of resources in the account, etc.
    if fileToSign == '':   # If no file name was sent, fail.
        print('Sent Empty file name')
        sys.exit(0)
    elif "PART_OF_FILE_NAME" not in fileToSign:   # Function should get only specific file name, disallowing misuse of other file located in the folder
        print('File does not exist! (1)')
        sys.exit(0)
    elif get_s3_object(fileToSign) != 200:    # Check if the requested file really exists, and by that disallowing further misuse of the system, function resource, Keep URL name hidden, and existing files in the folder unknown.
        print('File does not exist! (2)')
        sys.exit(0)
I am not mentioning any IAM role since it is obvious one is needed for the lambda and the use of any other service.
Let’s test our solution:
-
If we try to access our file directly through the CloudFront domain and link:
https://abcdefg1234567.cloudfront.net/File.txt
we will get: Missing Key-Pair-Id query parameter or cookie value -
If we try to access the file directly from the S3 bucket (which you most certainly need to block) at: https://abcdefg1234567.s3.amazonaws.com/Folder_name/File.txt
We will get: Access Denied -
When providing a date before “Today” on your Lambda function, you will get Access Denied (sounds pretty self-explanatory, but well worth a try).
-
When you change any character of the file name, for example from F to f, you will get Access Denied, so it is visible that the process differentiates between lowercase and uppercase.
-
Trying to access an existing file (for example File2.txt) with an existing presigned URL that was generated for our original “File” will fail as well. This means that no one can traverse inside our bucket in the hope of finding hidden treasure inside the bucket.
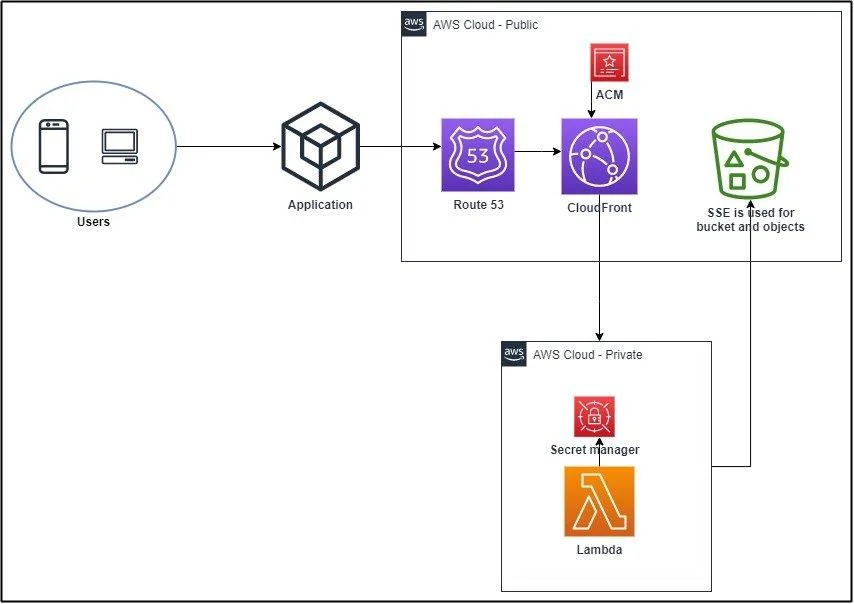
Finally, this is the flow of our solution :
Users request access to a file that belongs to them, (the user cannot access any other file nor can anyone else can see that user’s files). There is a time-limitation for accessing the file, which further adds to the security level for both the user and the company.) The application connects to Route 53, which is connected to CloudFront.
Since it is a URL, ACM provides SSL for a secured connection. CloudFront then connects to our Lambda function to provide the presigned URL. Lambda requests the private key to see if the request matches what the Secrets Manager holds. If all is good, Lambda contacts the S3 bucket to provide the user with the requested file via a presigned URL.
So, we have all these different services, and we saw how they came together and eventually provided us with the functionality we required. All and all, a good day’s work – another day, another solution, onwards and upwards, to the clouds!
Links:
https://aws.amazon.com/route53/
https://aws.amazon.com/secrets-manager/
https://aws.amazon.com/lambda/
https://www.automat-it.com/post/lambda-layer
https://aws.amazon.com/cloudfront/
